In this guide you will learn how to quickly and correctly register and create an account on BitGet. Everything will be simple and easy to understand!
BitGet is a digital asset exchange founded in 2018 and has already established itself as reliable and convenient for traders of all levels. It offers a wide range of services including spot trading, futures, and copy trading. Interestingly, BitGet was the first platform to launch Copy Trading, a social trading service that allows beginners to copy trades of successful traders. Over four years of operation, the platform has been appreciated by millions of users around the world.
Now let’s move directly to registration.
Step 1: Go to the official BitGet website
First of all, you need to go to the official website of the exchange. Just open your browser and type bitget.com in the address bar or follow our referral link:
It’s important to make sure you’re on a real website to avoid phishing attacks. So be sure to check the correct spelling of the domain.
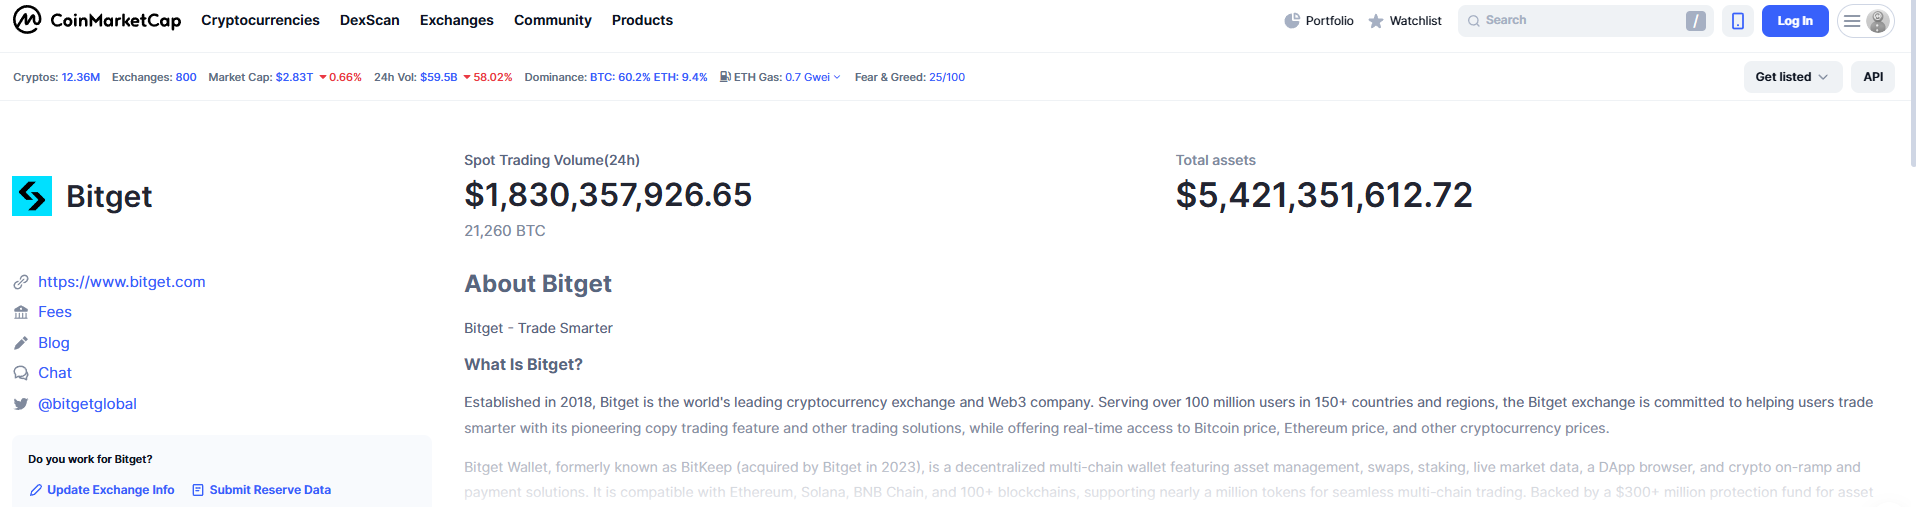
The correct URL can also be viewed on CoinMarketCap. What coinmarketcap is used for is described in detail in this article.
It is best to add the site to your bookmarks to avoid errors when entering the address manually in the future.
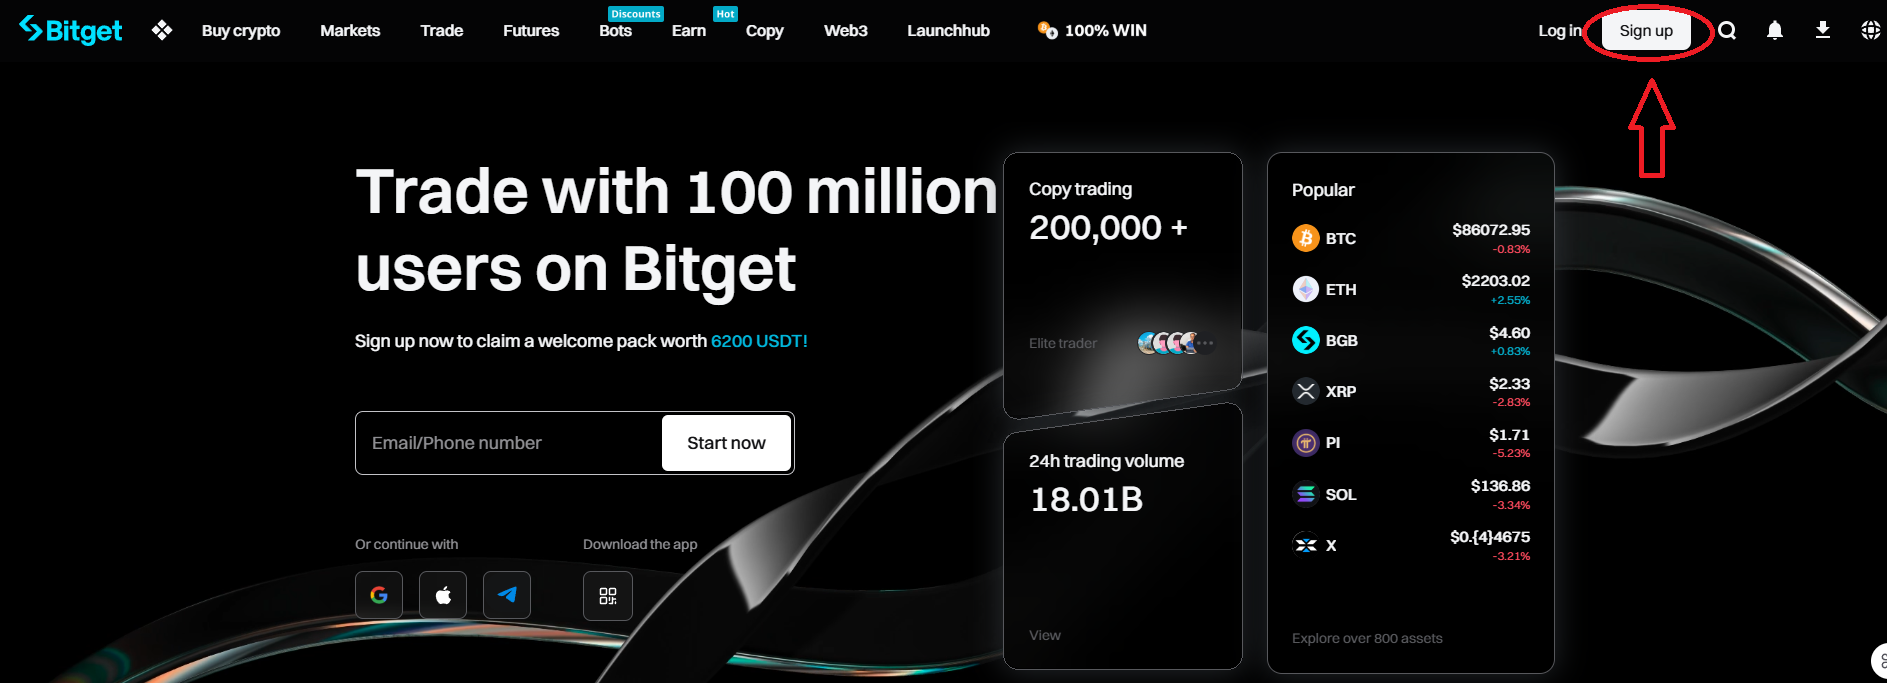
Step 2: Click on the “Register” button
On the main page of the site you will find a large button labeled “Register”. Click on it and a form will open to enter your data.
Step 3: Enter your registration details
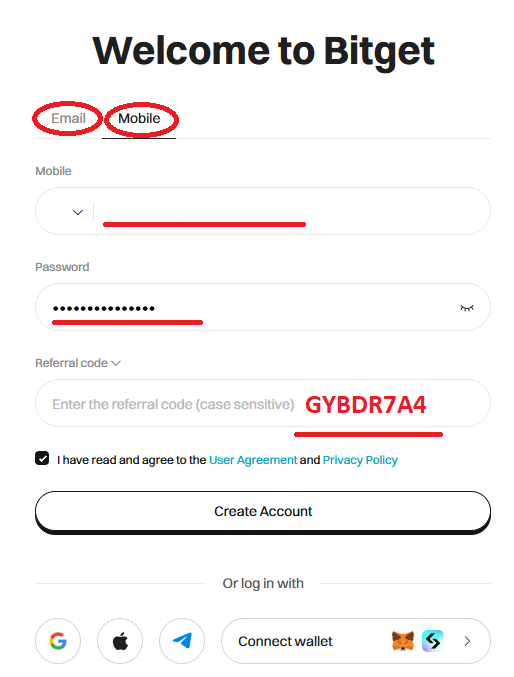
Everything here is pretty standard, but it’s important to fill out each field carefully. Here is what you will need to specify:
Email registration:
- Enter your e-mail address
- Create a strong password (a combination of letters, numbers and special characters is recommended)
- You can specify referral code GYBDR7A4 enter it in the corresponding field to get maximum bonuses and discounts for registration
- Click “Register”
Register by phone number:
- Enter your phone number, including country code
- Create a password for your account
- You can specify referral code GYBDR7A4 enter it in the corresponding field to get maximum bonuses and discounts for registration
- Click “Register”
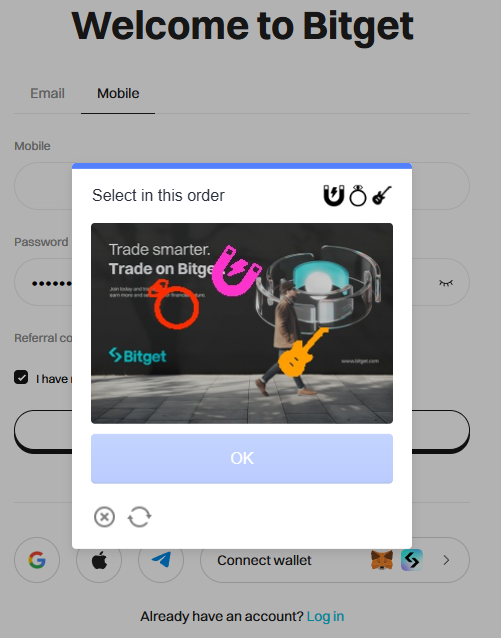
Step 4: Confirm registration
Pass the check from the exchange and click “Ok”
Bitget will send a confirmation code to your phone number or email address.
Enter the received code on the site to complete the registration process.
Step 5: Security Configuration
Now that registration is complete, go back to the BitGet homepage and log in using the phone number or email and password you provided earlier.
After successful registration, you will be prompted to set up two-factor authentication (2FA) to protect your account.
It is strongly recommended to use Google Authenticator or other similar service to obtain one-time codes.
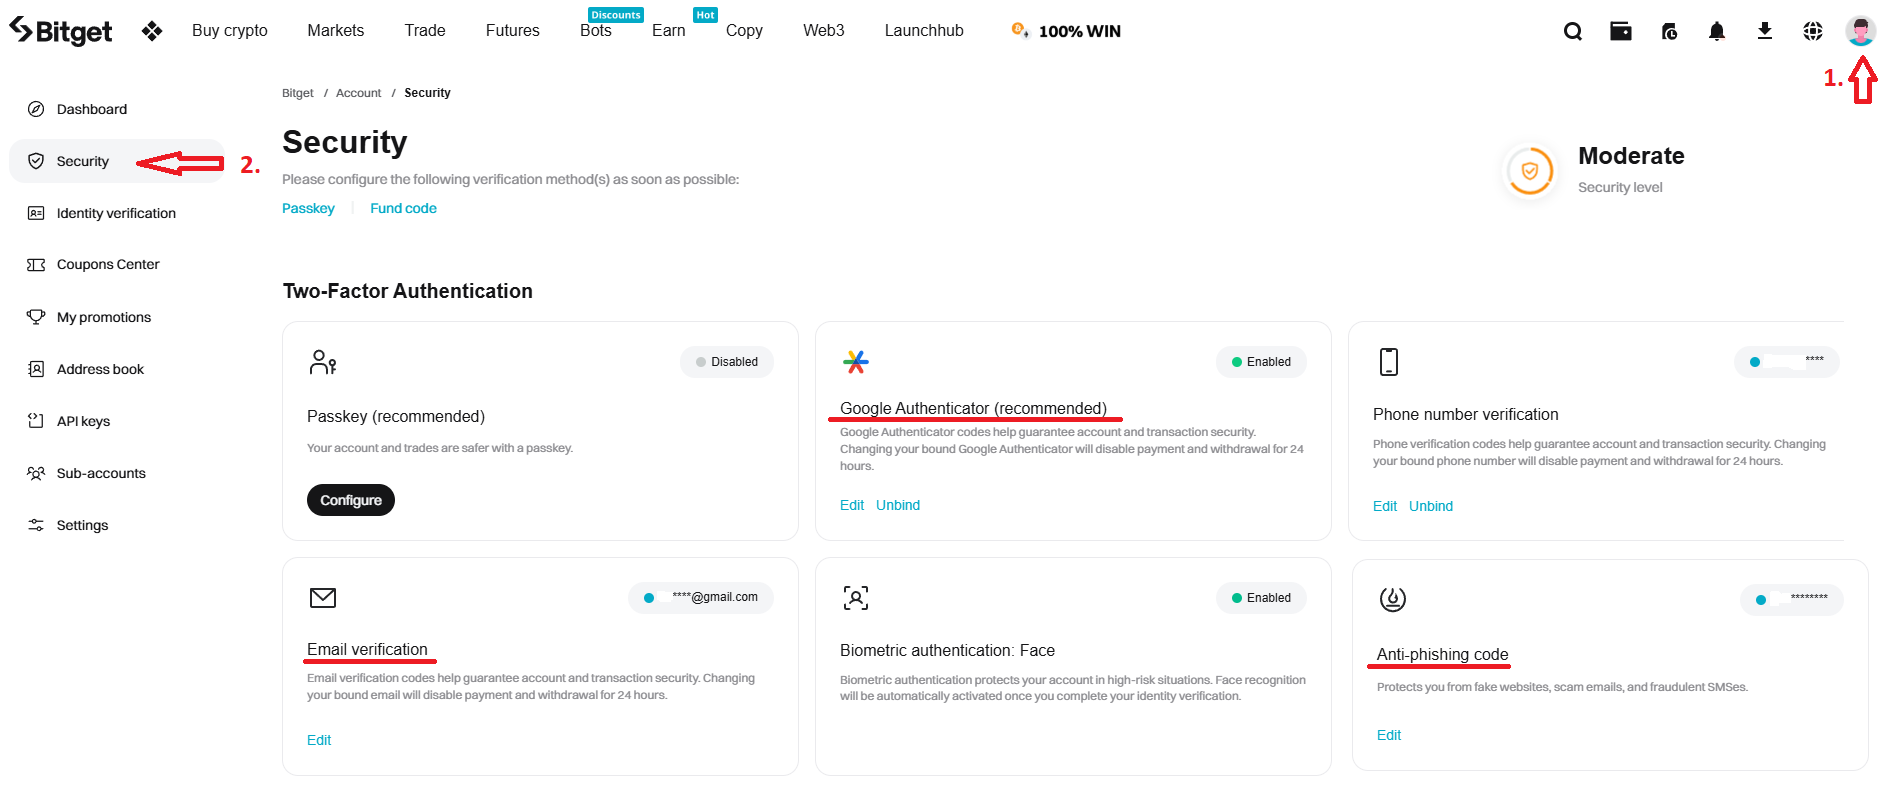
Two-factor authentication
Two-factor authentication (2FA) provides an additional layer of protection when logging into your account and withdrawing funds.
If you registered using a phone number, you can enable 2FA via e-mail in the settings. And if you registered by e-mail, 2FA can be set up via phone. In our case we used a phone, so we add a mailbox.
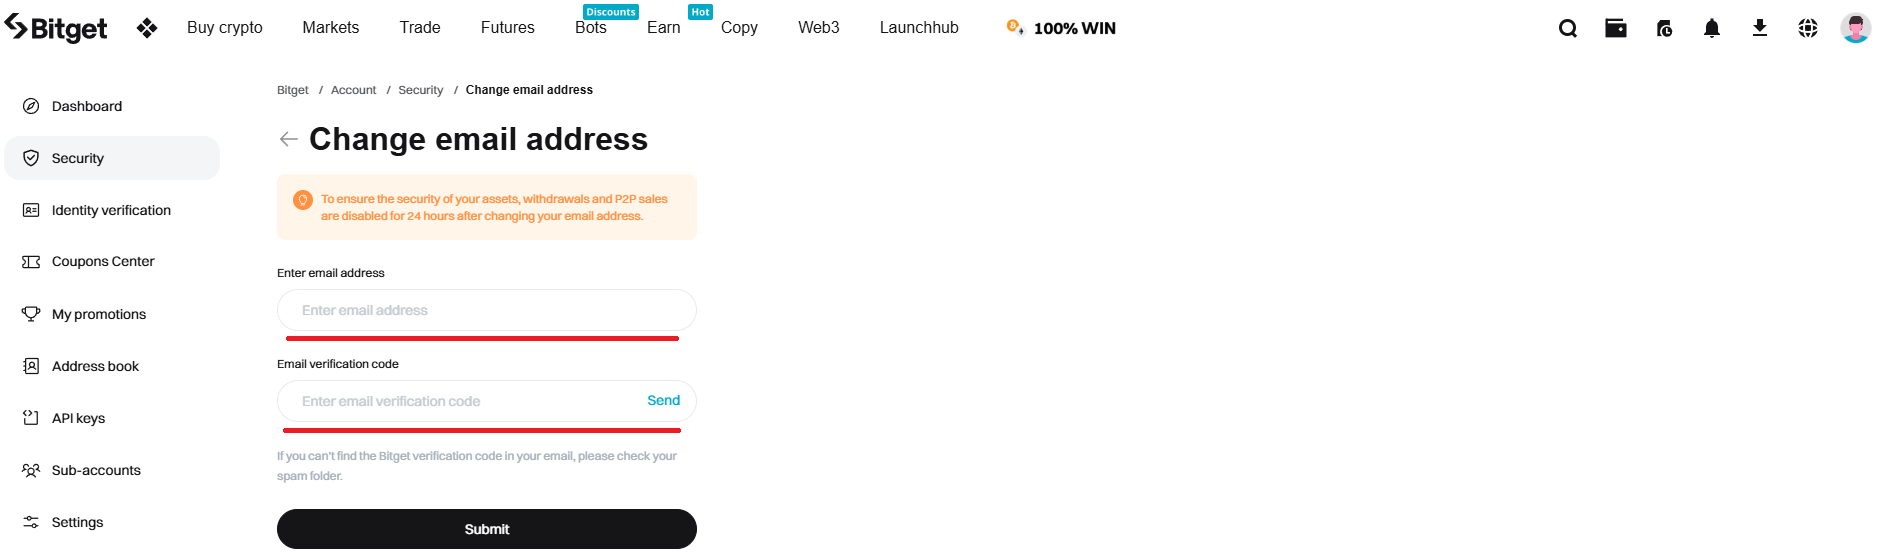
- Click “Settings” in the “Email” section
- Enter your e-mail address and click “Get”
- Get the verification code from the e-mail that came to the specified e-mail and enter it
- Then press “Send”
- Enter your e-mail address and press “Get”
- Get the verification code from the e-mail and enter it
- Then press “Send”
Google Authenticator
Google Authenticator is a mobile application that creates one-time codes to confirm actions. Even if attackers gain access to your username and password, without physical access to your device, they will not be able to use your account.
To customize the app, tap “Settings” under “Google Authenticator code (recommended).” A screen will appear with a QR code and a character set – both options allow you to connect Google Authenticator. We’ll look at the second option.
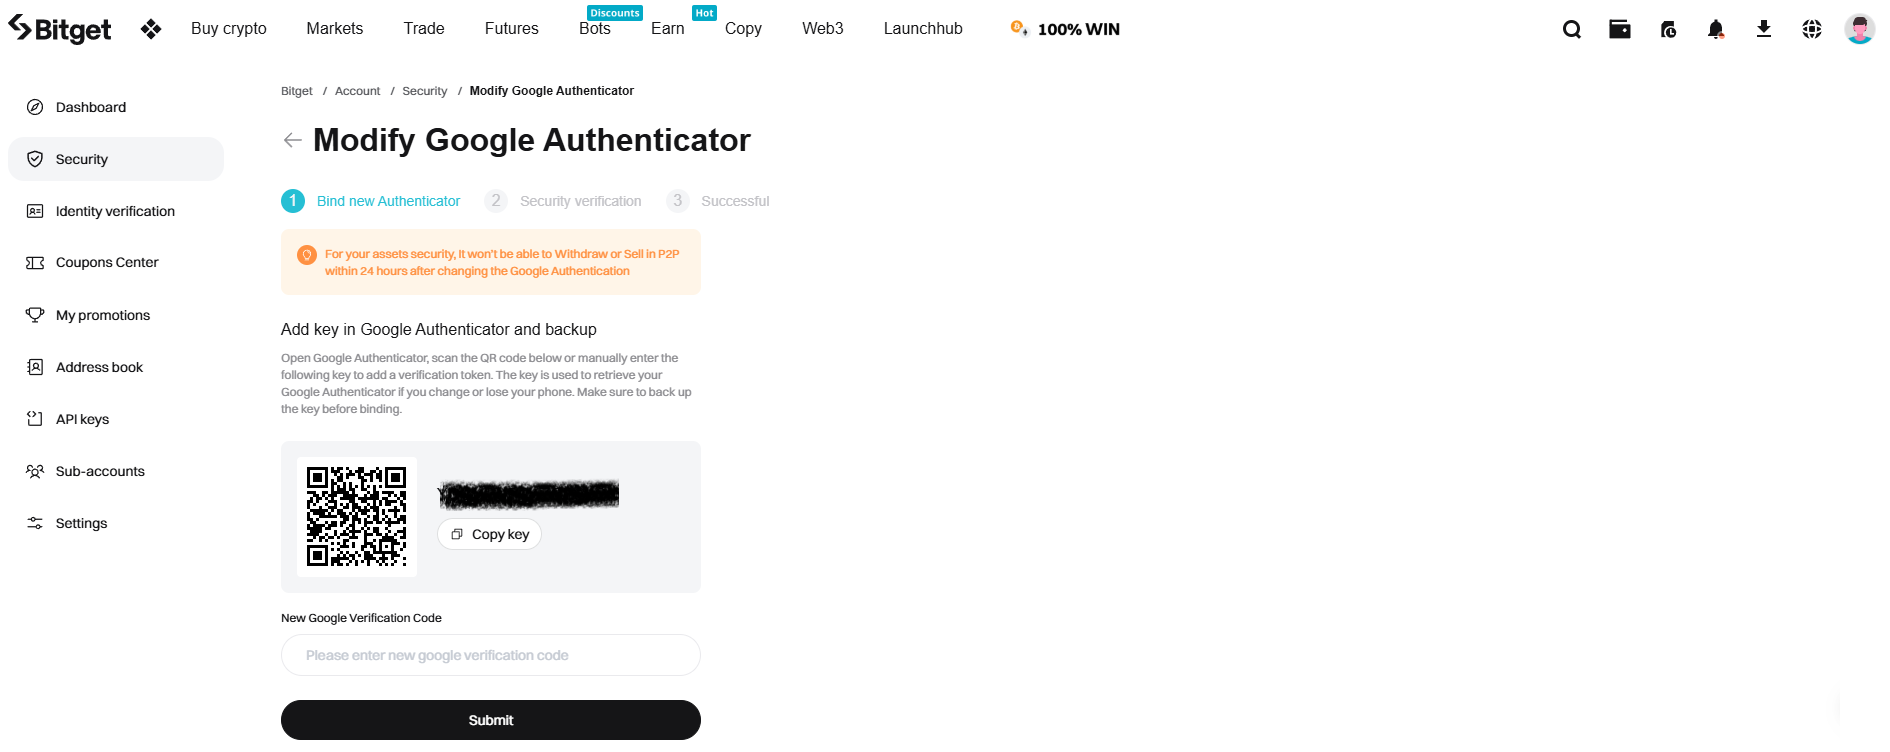
Install Google Authenticator from the official app store, open it and press “+”.
- Select the “Enter customization key” option
- Specify the account name and insert a sequence of characters from Bitget
- Select the type of key – by time (auto refresh every 30 seconds) or by counter (manual refresh)
- It is better to choose “By time”. Press “Add”
- A six-digit code will appear on the phone screen – enter it on Bitget. Then press “Send”
- We pass the security check: enter the code from SMS and e-mail. Then press “Confirm”
- That’s it, we have bound Google Authenticator to your Bitget account
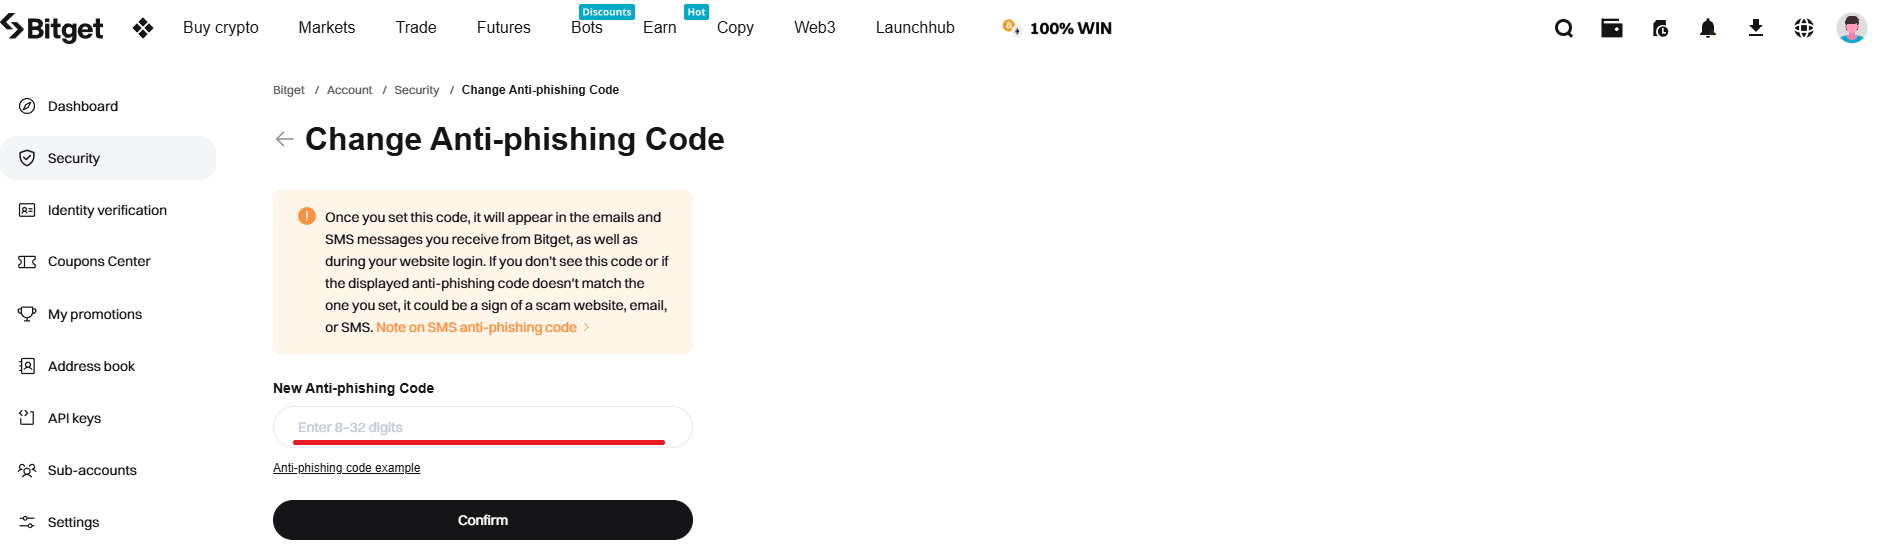
Anti-phishing code
An anti-phishing code helps you recognize genuine emails from Bitget, protecting you from fraudulent messages. If an email lacks this code, it is probably fake and it is not safe to click on links within it. Only trust emails that contain the anti-phishing code.
To activate the feature, tap “Settings” under “Anti-Phishing Code”.
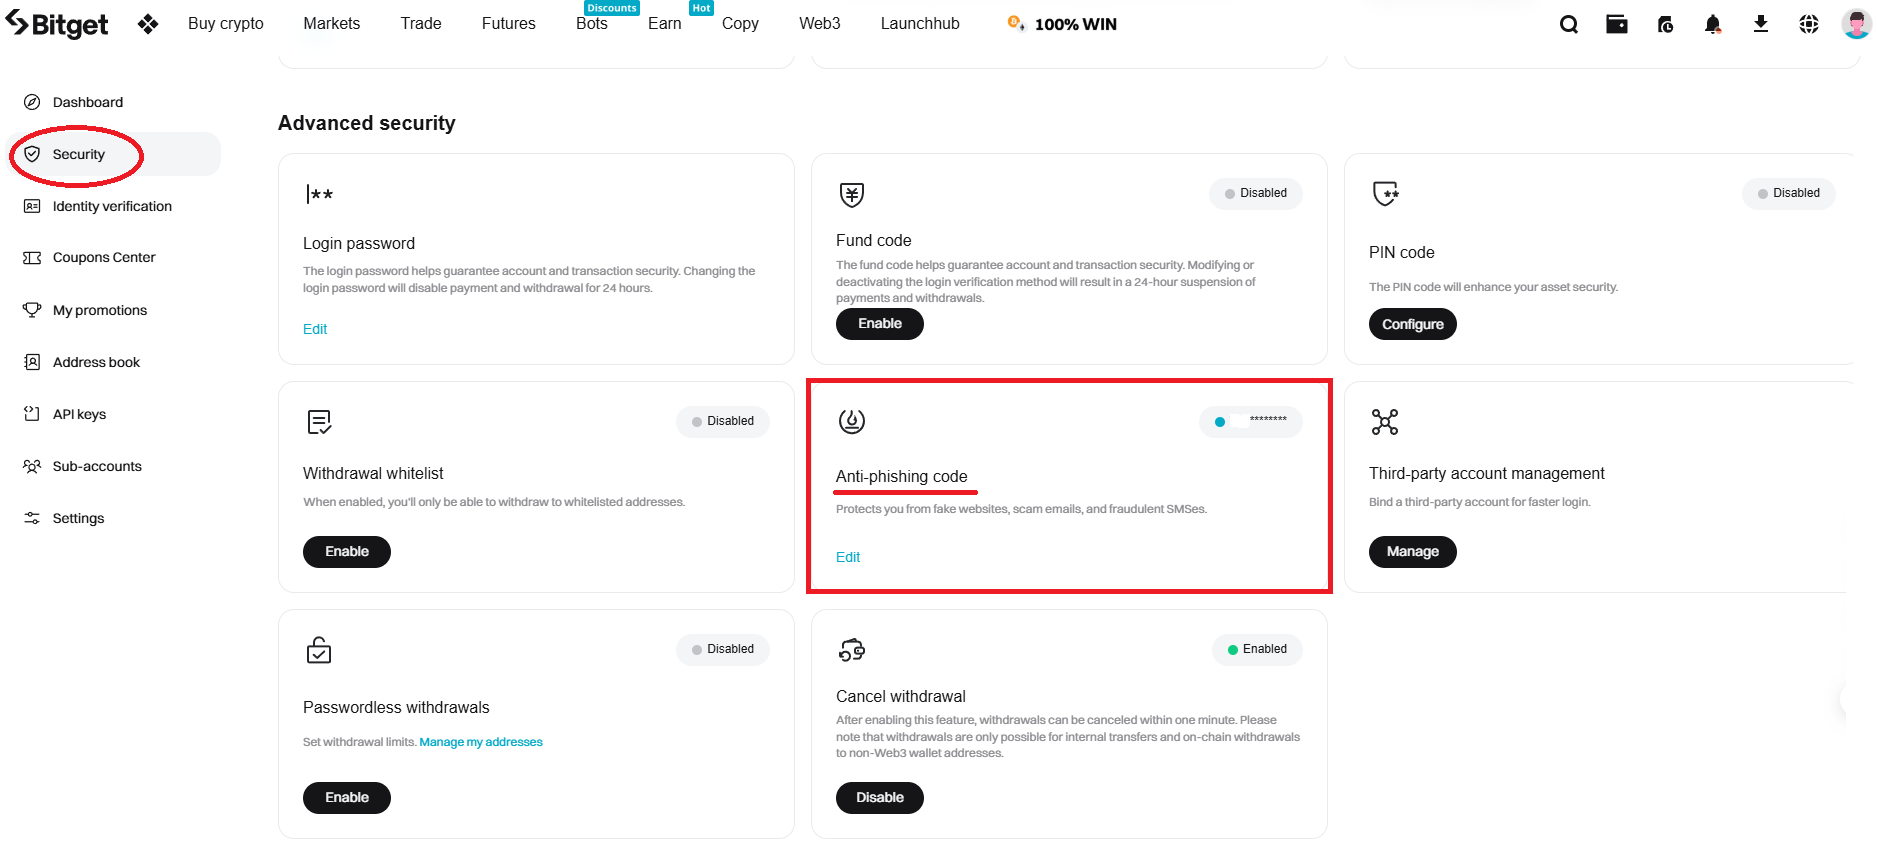
Create a code from 8 to 32 characters long and click “Submit”. The anti-phishing code is now configured and ready to use.
Step 6: How to pass KYC on Bitget exchange
What is KYC? KYC stands for Know Your Customer. Verification is necessary to ensure the security of your account and to gain access to advanced features, as well as to increase deposit and withdrawal limits. Without verification, you cannot deposit funds into your account and therefore you will not be able to trade. It is important to provide accurate data and high-quality copies of documents to avoid delays in verification.
A step-by-step guide to getting verified on Bitget:
Log in to your Bitget account
1. Go to the official Bitget website and log in using your username and password
2. If you don’t have an account yet, go through the registration process
Go to the test section
1. After logging into your account, click on the profile icon at the top right of the screen
2. From the drop-down menu, select Identify

Selecting the test level
1. On the verification page, you will see the KYC levels:
- Level 1: Basic Verification (includes proof of identity)
- Level 2: Advanced Verification (additional documents required)
2. Decide on the level of vetting you plan to undergo

Filling in personal information
1. Enter your personal information, including date of birth, your full name and residential address. Make sure that all information matches your documents
2. Confirm the entered data and proceed to the next step
Uploading documents
- Select the type of document for identification: passport, driver’s license or national ID card
- Upload clear pictures of both sides of the document
- If necessary, if Bitget requires proof of address, then upload a document that proves your address (e.g. a utility receipt or bank statement).
Photo or selfies (if required)
1. You may need to take selfies with the document in your hands. Make sure your face and the document are clearly visible in the photo
Send it in for inspection
1. Check the correctness of the entered data and uploaded files
2. Click “Submit” to submit the application for verification.
Wait for the result
Validation usually takes a few minutes to a few days. You will be notified of the verification results by email or in the Bitget app.
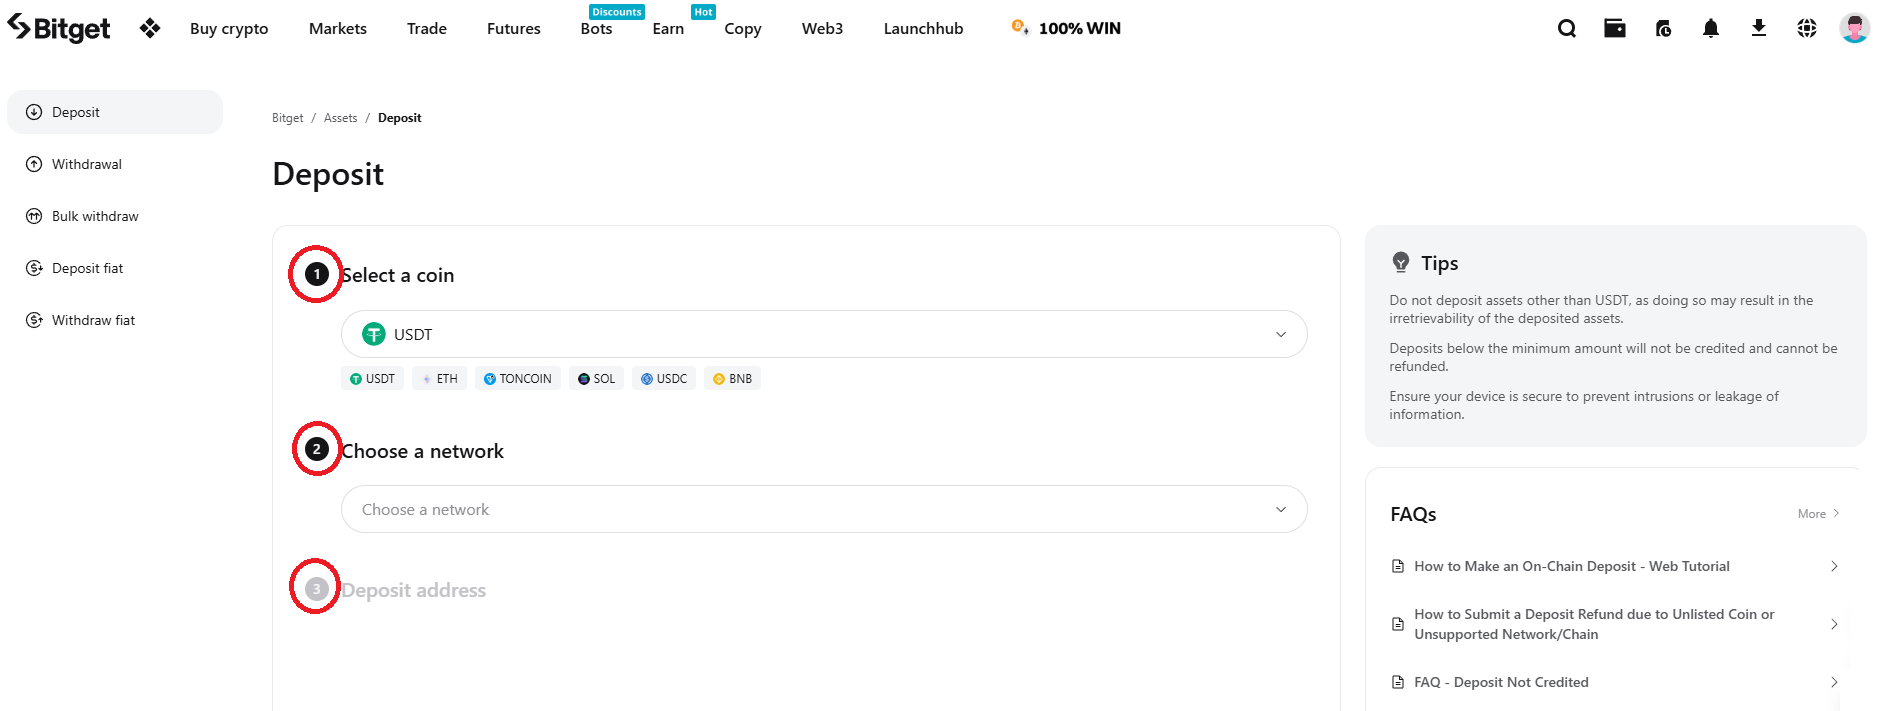
Step 7: Deposit to your account
After logging into your personal account, go to the “Assets” section and select the deposit method: via cryptocurrency transfer or buying cryptocurrency with a bank card.
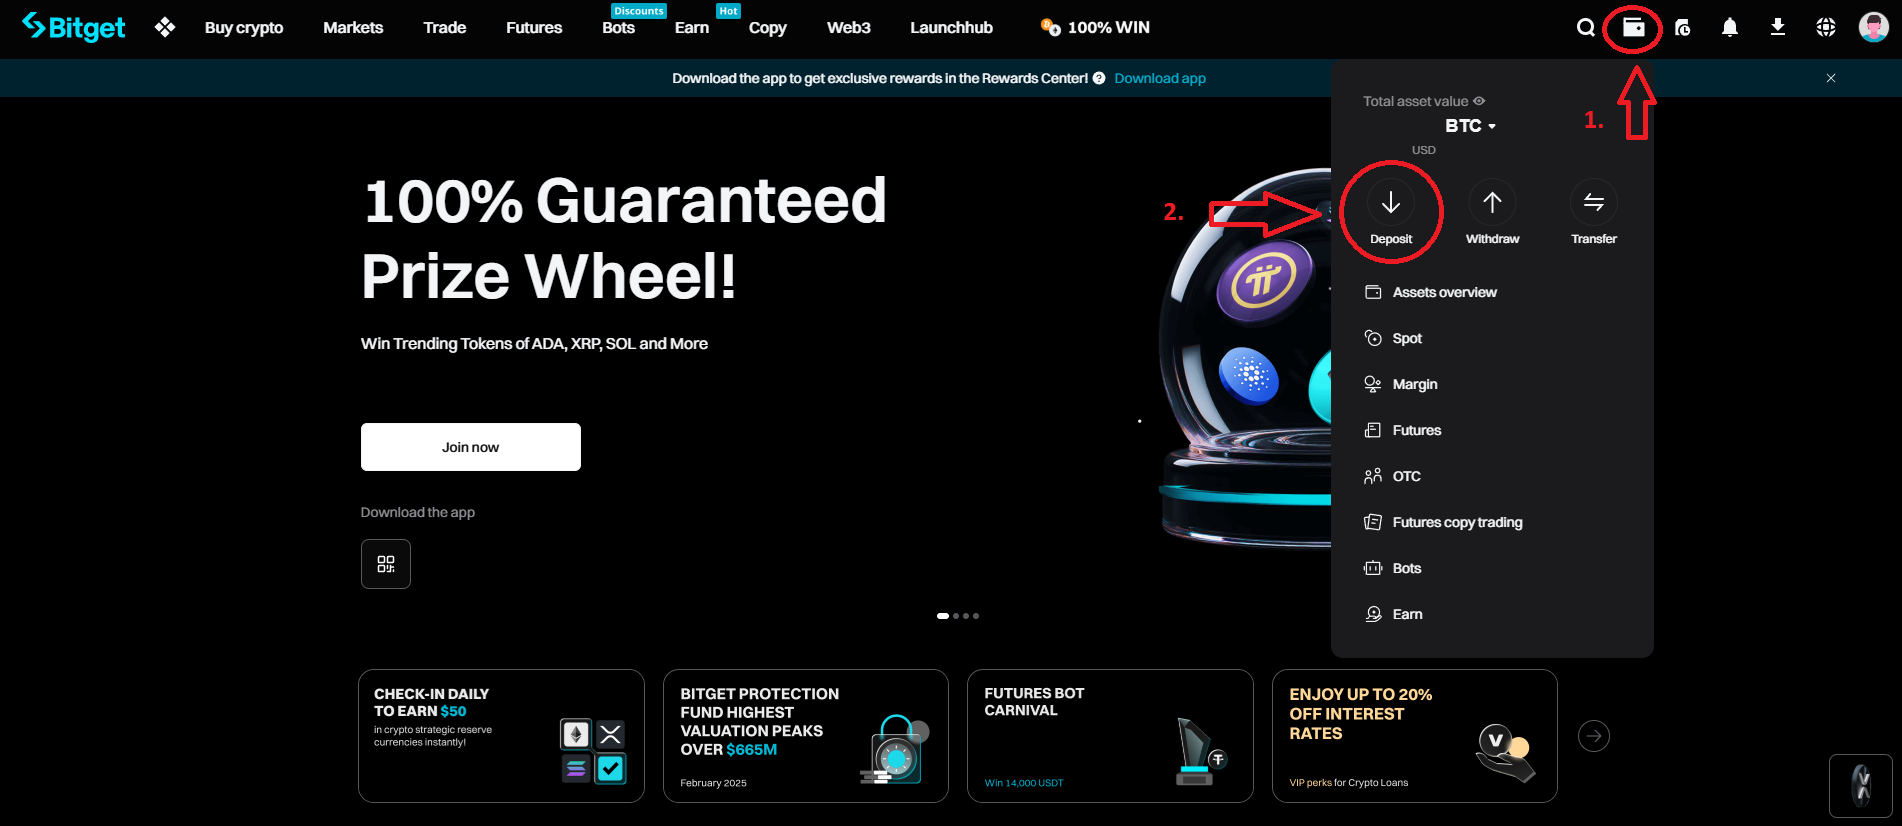
Choose the desired coin, for example: Bitcoin (BTC), Ethereum (ETH), Tether (USDT) copy the wallet address and send the funds. Once received, they will be displayed in your account.
Conclusion
That’s it! You have successfully registered, created an account and funded your BitGet account. Now you can start trading or exploring the platform’s features. Remember that success in trading depends not only on your choice of exchange, but also on your strategy and discipline.